The Filespace holds production files such as scripts and shooting schedules. Your film project's current plan must include Filespace access. Uploading and organizing files requires admin access to an open project; other accepted members can only view and download files they are allowed to access.
Upload files
- Open your film project and select Filespace.
- If needed, select Create folder and open the folder you want.
- Select Upload and choose your files. On desktop, you can also drag files into the upload area.
- If events have already been loaded for the project, an assignment dialog appears before upload. Select Project (no event) or the event you want and confirm.
- Wait for the result and check that every file appears in the list. Observe the displayed file-size and storage limits.
Assign a file to an event
- Select the file using its checkbox, not its preview action. Folders cannot be assigned this way.
- Select Link to event. This action is available when events have been loaded for the project.
- In the Assign to Event dialog, select the event and confirm.
- Check the assignment in the event's Filespace.
A new assignment replaces that file's previous event assignment. Linking does not grant access to every participant: check the Access indicator and the applicable file or document permissions.
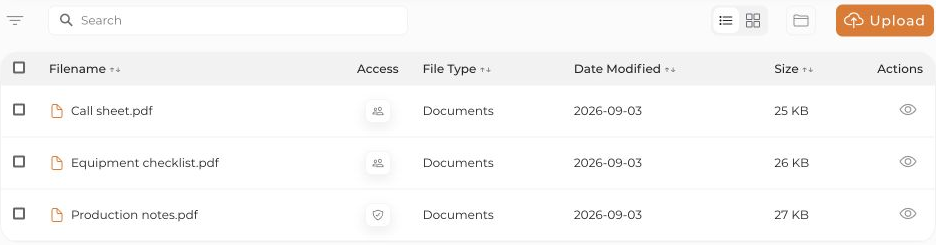
Find files again
Use search and filters. In the project Filespace, remove an event assignment through Link to event → Project (remove event). In the event's Filespace, use Remove from event. The file remains assigned to the project.
Delete is a different action: it removes the file or folder. Read the confirmation and delete only if the contents are no longer needed or you have a separate backup.


