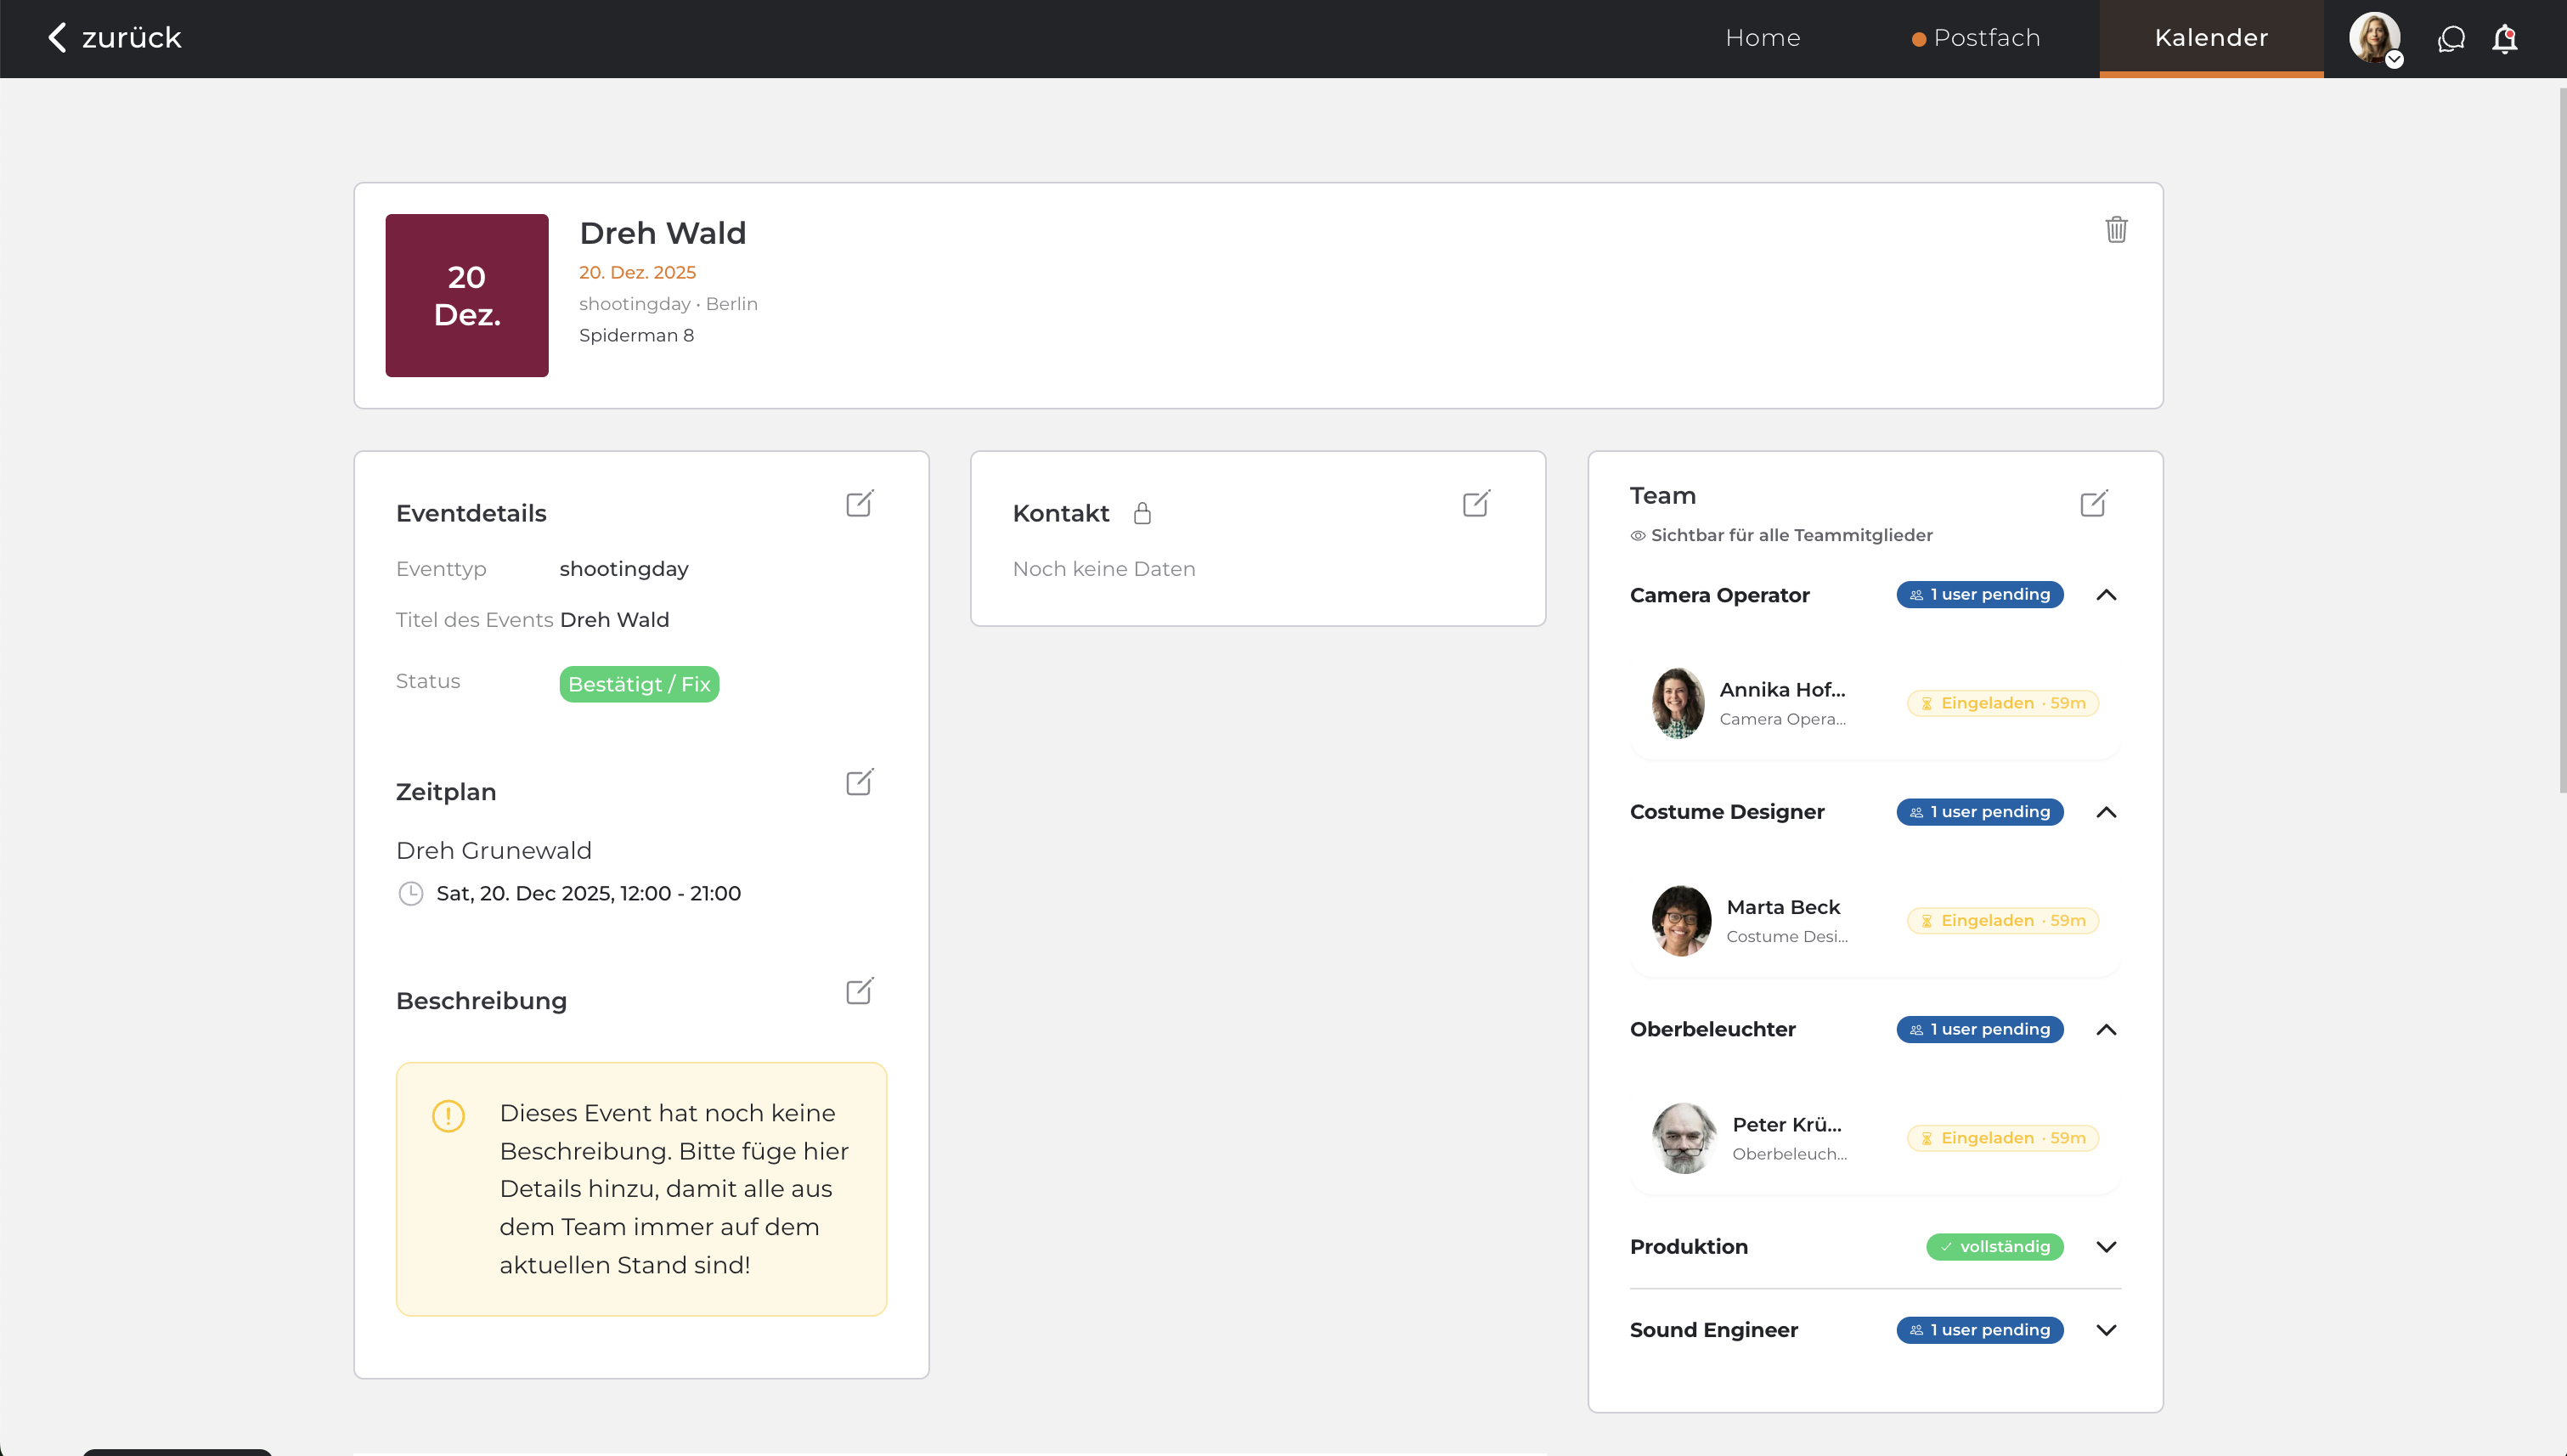
As soon as you have saved your event, the staffing agent sends out the invitations. As an admin, you can see at any time who has already accepted, who is still missing and where you need to intervene ## 1. Monitor status Open the event in the calendar and click on the Team tab to see the overview. Each team member has a status: - Requested (yellow): The invitation has been sent, but the person has not yet responded. - Accepted (green): The person has accepted the job.
- Rejected (Red): The person has declined - In Smart Mode: The system automatically requests the next priority - In First Come First Serve Mode: The person is out, others still have a chance to accept
 ## 2. Manual confirmation Team members can activate "Auto-Accept" for your project in their settings. This means: The system automatically accepts on their behalf, but only if there are no conflicts in their calendar at that time. If you as an admin want to make sure that the person actively checks the request (even if they have time according to the calendar), you can request explicit manual confirmation - If you activate the option: The team member's auto-accept will be ignored. The person must actively click on the "Accept" button for the booking to take place - If you leave the option deactivated: If the team member has activated Auto-Accept and is free in the calendar, the confirmation is made automatically and immediately ## 3. Edit team later You can also make changes after the invitations have been sent. To do this, click on the pencil icon in the team area. - Add people: Select the person with a single click or double-click (if absolutely necessary). - Change priorities: As long as no invitation has been sent to priority 2, you can change the order using drag & drop.